Decorative Entryway Hooks: Making a Hook Rail Part of the Decor
Six steps for turning hooks by the door into wall decor: choosing a style, an arrangement, spacing and height, then styling what hangs there so it looks chosen.
At a glance
- Difficulty
- Intermediate
- Time
- About 1 to 2 hours, including the mock-up
- Best for
- Entries with a bench or a blank wall beside the door
- Renter note
- Needs wall fixings: choose them for your wall type and ask before drilling
What you need
- Hook rail or individual hooks
- Tape measure
- Painter's tape
- Pencil
- Level
- Fixings suited to your wall type
Hooks are usually the last thing anyone thinks about by the door and the first thing visitors see, because they sit at eye level and wear the household’s coats. A random strip of metal pegs can undo a carefully chosen mirror and rug.
Treated as a design choice, though, entryway hooks become wall decor that happens to be useful. The six steps below take you from choosing a style to styling what hangs there, so the rail looks intentional whether it is full or empty.
Step 1: Pick a style that suits the wall
Decide what you want the hooks to look like with nothing on them. That is how you will see them for half the year.
- A wooden peg rail. A long strip with evenly spaced turned pegs. It draws one calm horizontal line across the wall and suits simple, natural and cottage-style entries. A peg rail entryway also works in a narrow hall because it projects very little.
- Individual knobs. Separate round or faceted knobs in wood, ceramic or metal. They read as dots of color and can be arranged freely.
- Sculptural metal hooks. Curved, folded or looped shapes in brass, black or brushed steel. Use a few, spaced generously, and let each one stand as a small object.
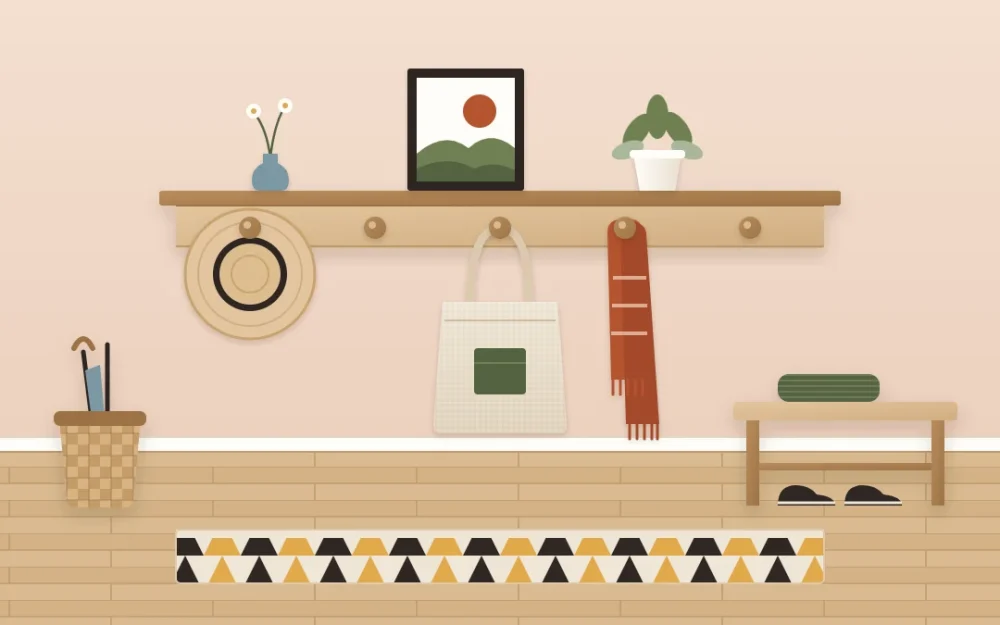
- A rail with a shelf. Pegs below, a narrow ledge above for a print, a small plant or a bowl. It gives you a display and a hanging spot in one piece.
Match the finish to something already in the entry: the door handle, the mirror frame or the legs of the bench. One repeated metal or wood tone ties the hooks into the rest of the wall.
Step 2: Choose an arrangement
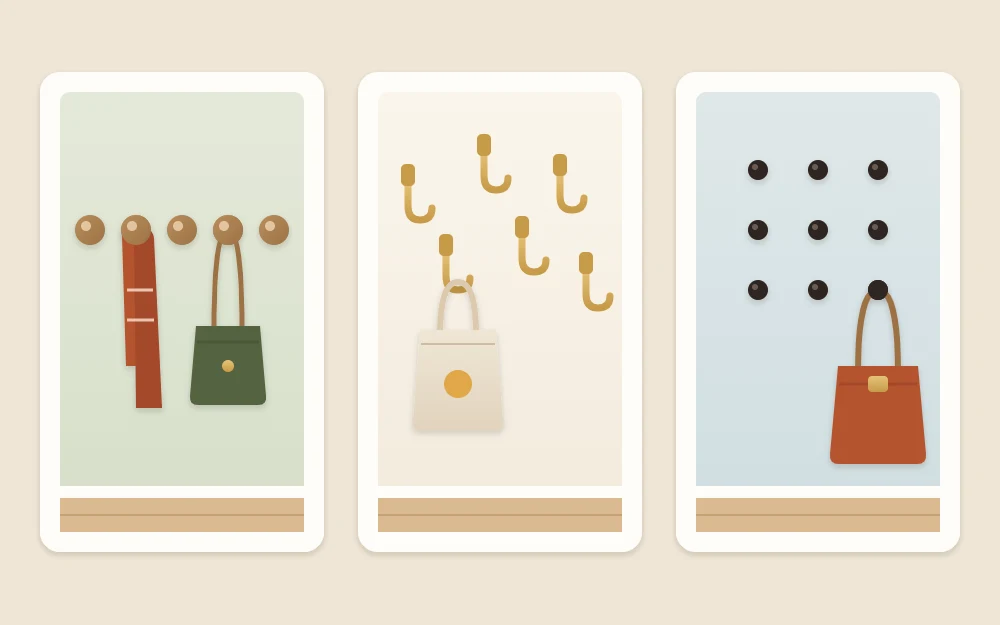
With a rail, the arrangement is decided for you. With separate decorative wall hooks, you have three reliable patterns.
- A straight row is the quietest option and the easiest to line up with a bench or console below.
- Staggered heights turn the hooks into a loose zigzag. This suits households with children, since the lower hooks are reachable, and it spreads bulky coats so they overlap less.
- A grid of small pegs, three across and three down for example, covers a whole panel of wall and looks like an art installation even when only one bag is hanging.
Step 3: Work out spacing and height
These numbers are common starting points, not rules. Adjust them to the people and the coats in your home.
- Spacing: roughly 6 to 8 in (15 to 20 cm) between hooks leaves room for winter coats. Small knobs meant for hats, keys or scarves can sit closer, at about 4 in (10 cm).
- Height for adults: around 60 to 66 in (152 to 168 cm) from the floor is a comfortable reach for most adults and keeps long coats off the ground.
- Height for children: a lower row at about 36 to 42 in (91 to 107 cm) lets small children manage their own jackets.
- Above a bench: set the hooks high enough that someone can sit down without leaning into the coats. For choosing and dressing the seat itself, see the entryway bench ideas.
Keep the whole arrangement about as wide as the furniture beneath it, or a little narrower, so the two read as one group.
Step 4: Mock it up before you commit
- Cut a strip of painter’s tape the length of the rail, or tear small squares of tape for individual hooks.
- Stick the tape to the wall at the planned height and spacing. Paint finishes vary, so press lightly and test a small piece in a hidden spot first.
- Hold a coat and a bag against the marks to check that they clear the bench, the door swing and anything else on the wall.
- Step back to the front door and look. Shift the marks until the line sits level and centered on the furniture below.
- Mark the final positions lightly in pencil, using a level across the row.
Step 5: Fix the hooks to suit your wall
How you attach an entryway hook rail depends on three things: your wall type, the weight of what will hang there (wet winter coats and loaded bags are heavier than they look) and the manufacturer instructions that come with the rail and with the hardware. Choose fixings with all three in mind, and if you are unsure what your wall is made of, ask at a hardware store or get help from someone experienced.
Good to know
Adhesive hooks are a lower-commitment option for light items such as a hat or a scarf, but they have honest limits. Paint finishes and surfaces vary, so test one in a hidden spot first and follow the manufacturer instructions for use and for removal. In a rental, check your lease or ask before making changes.
Step 6: Style what hangs there
This is the step that makes wall hooks as decor believable. Think of the rail as a display with a strict guest list.
- Choose three things that look good together: one hat, one bag and one scarf is a classic set. A straw hat, a canvas tote and a striped scarf make a small still life.
- Leave at least one hook in every three or four empty. Bare pegs are what make the full ones look chosen.
- Limit each person to one coat on show. The rest belong in a closet or another room.
- Keep colors in the same family as the entry palette where you can.
If the hooks keep filling up anyway, the entry probably needs another landing spot. The guide to balancing decor and function maps each daily item to a good-looking home.
Pair the hooks with a mirror, art or a shelf
Hooks look more deliberate when they belong to a composition. Three pairings work well:
- Hooks beside a mirror. A tall mirror on one side and a short row of hooks on the other gives you an asymmetrical pair with a clear purpose: hang up, check, go.
- Art above the rail. One framed print centered over a peg rail finishes the wall. Leave a clear gap so coats do not brush the frame.
- A shelf over the hooks. A ledge above the pegs holds a plant, a bowl and a leaning frame. The guide to entryway shelf styling shows how to arrange it.
Whichever you choose, align one edge or the centerline of the two pieces, and repeat one finish between them.
Frequently asked questions
How high should hooks go by the front door?
A common starting point for adults is around 60 to 66 inches from the floor, which keeps long coats off the ground and within easy reach. Add a lower row for children if needed. Mark the height with painter's tape and hold a coat against it before you fix anything.
How many hooks does an entry need?
Fewer than you think. Plan for one coat per person on show plus one or two hooks for a bag and a hat, and store the rest elsewhere. A rail that is never more than two-thirds full, as a loose guide, looks styled instead of overloaded.
Are adhesive hooks a good choice for an entry wall?
They can suit light items such as a hat, a scarf or keys, and they are easier to take with you. Paint finishes and surfaces vary, so test one in a hidden spot first and follow the manufacturer instructions for use and removal. For coats and loaded bags, choose proper fixings for your wall type.