How to Plan an Entryway Gallery Wall
Plan a gallery wall for the entry on paper before anything goes up: choose a unifying thread, pick a layout for the wall, test it with taped templates and set the height against the furniture below.
At a glance
- Difficulty
- Intermediate
- Time
- About 1 to 2 hours, plus hanging
- Best for
- A blank entry or hallway wall, especially above a bench or console
- Renter note
- Needs wall fixings: choose them for your wall type and ask before drilling
What you need
- Frames and artwork
- Brown paper or newspaper
- Scissors and pencil
- Painter's tape
- Tape measure
- Small level
- Hanging hardware suited to your wall
An entryway gallery wall has to work harder than one in a living room. You see it at close range, usually while walking, and the wall is often narrow, interrupted by a door frame or sitting above a bench. A loose scatter that looks relaxed across a big room can look like a mistake a few steps from the front door.
The answer is to do the arranging on paper before a single frame goes up. Plan the group as one shape, test it on the wall with templates and only then reach for hardware. It takes a little longer and saves a lot of second attempts.
Step 1: Choose a unifying thread
Entryway artwork can be varied (prints, family pictures, a small textile, a child’s drawing) as long as one thing ties it together. Pick a single thread and hold to it:
- Frame color: all oak, all black or all white, even if the sizes differ.
- Mats: the same white or cream mat around every piece.
- Palette: every piece shares two or three colors. Pull them from your entryway color palette so the wall belongs to the space.
- Subject: all botanical sketches, all landscapes or all abstract shapes.
One thread is enough. Two makes the group very calm. None is what produces the messy result people fear.
Step 2: Pick a gallery wall layout that fits the wall
Let the shape of the wall choose the layout, then let the layout decide how many frames you need.
| Layout | Suits | Character |
|---|---|---|
| Tight grid | A wide wall above a bench or console, with identical frames | Tailored and orderly |
| Single row | A long wall you walk beside | Calm, leads the eye forward |
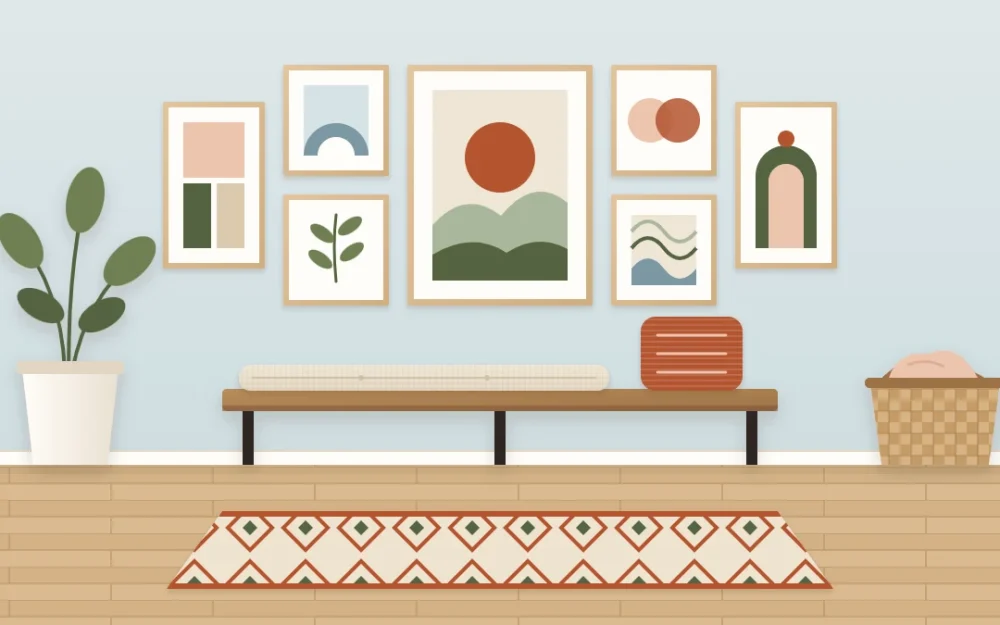
| Organic cluster | Mixed sizes gathered around one larger piece | Relaxed and collected |
| Vertical stack | A slim wall beside a door | Tall, draws the eye up |
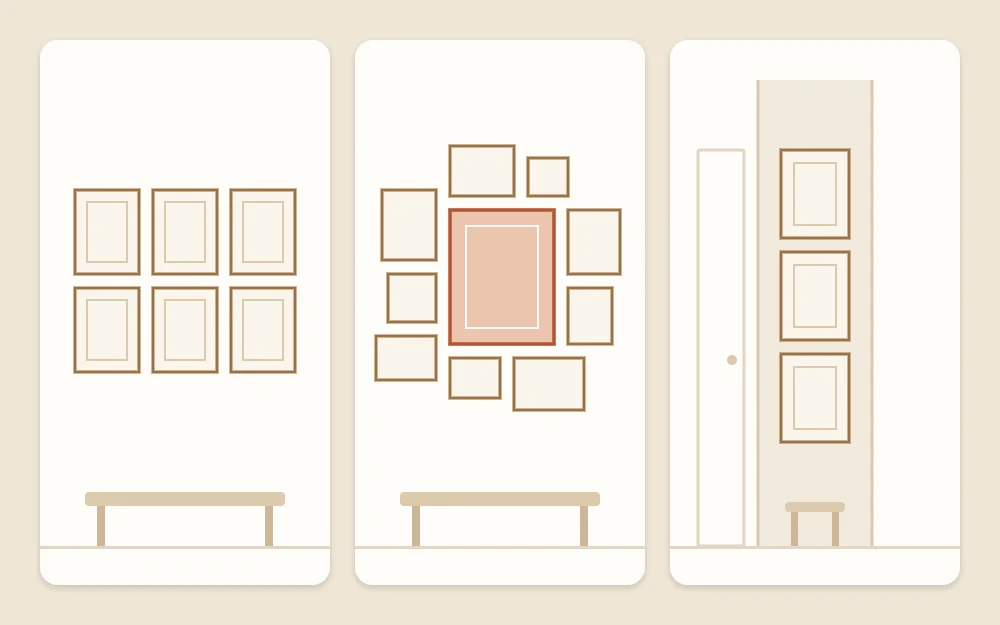
For a hallway gallery wall you pass at arm’s length, favor the row or the grid and choose shallow frames. For a cluster, start with the largest piece slightly off-center and build outward so the outer edge forms a rough rectangle or oval.
Step 3: Arrange it on the floor first
Clear a patch of floor about the size of the wall section and lay the frames out. Shuffle until the visual weight is balanced: large frames spread apart, dark images not all on one side, strong colors distributed.
Keep the gaps between frames consistent. About 2 to 3 in (5 to 8 cm) is a common starting point: a little closer for a tight grid, slightly wider for large frames. When it looks right, take a quick snapshot from above with your phone so you can rebuild it.
Step 4: Make paper templates and tape them up
- Trace each frame onto brown paper or newspaper and cut it out.
- On each template, mark where the frame’s hanging point sits. Measure from the top edge of the frame down to the hanger and transfer that spot to the paper.
- Tape the templates to the wall with painter’s tape in the arrangement you settled on.
- Step back to the front door, then walk past as you would when coming home.
- Move the templates until the spacing and the outer shape look right from both views.
This is the stage where an art arrangement for an entry gets corrected for free. Paper is easy to nudge; a hung frame is not.
Good to know
Even low-tack tape behaves differently from wall to wall. Paint finishes and surfaces vary, so test a small piece in a hidden spot first and follow the manufacturer instructions for use and removal.
Step 5: Set the height and relate it to the furniture
Treat the whole group as one large picture. A common rule of thumb is to place the center of that shape near eye level, roughly 57 in (145 cm) from the floor, then adjust for your household and for what stands below.
Above a bench or console, leave about 6 to 8 in (15 to 20 cm) between the furniture and the lowest frames so art and furniture read as one composition. Keep the group a little narrower than the piece beneath it. Over a bench, check that nobody’s head will meet a frame when they sit down. Near the door, keep frames clear of the swing and of the spot where bags get slung.
Step 6: Hang through the templates
With the templates in place, each one already shows where its hanging point goes. Choose hardware for your wall type, each frame’s weight and the manufacturer instructions for both the hardware and the frame. What suits a small print is not automatically right for a large glazed piece. If a frame is heavy, or you are unsure what your wall is made of, get help before you start.
Work from the center piece outward. Fix through the mark on the paper, tear the template away and put the frame up, checking each one with a small level. Because the positions were settled on paper, each frame needs only the fixing it will keep, not a trail of second tries.
Tip
Keep the phone snapshot of your floor layout open while you work. It is surprisingly easy to swap two similar frames once the templates come down.
The flexible alternative: a picture ledge
If you like changing art often, one or two shallow picture ledges give a gallery effect with far fewer fixings. Lean frames of different heights, overlap them slightly and put the tallest toward the back. The same thread rule applies, and the ledge itself needs hardware suited to the wall type, the weight it will carry and the manufacturer instructions.
If you rent and would rather fix very little to the wall, you can lean art on a console or try the lower-commitment options in the renter-friendly entryway ideas; check your lease or ask before making changes. And if a full gallery starts to feel like too much for a small wall, the wall decor ideas beyond the mirror include a vertical pair of prints and a single oversized artwork.
Frequently asked questions
How many frames do I need for a gallery wall in an entry?
It depends on the wall, not on a set number. Three stacked frames can fill a slim wall beside a door, while a wide wall above a bench may take six to nine. Decide the layout and the outer shape first, then count how many frames fill it with even gaps.
Do all the frames have to match?
No, but something should. Matching frames give the most orderly look and suit a grid. Mixed frames work in an organic cluster when the mats, the colors in the artwork or the subject are consistent. Without any shared element, a group at close range tends to look accidental.
Is a picture ledge easier than hanging each frame?
A ledge needs fewer fixings and lets you swap or rearrange art whenever you like, which suits people who change their minds. It still has to be fixed with hardware chosen for the wall type, the weight it will carry and the manufacturer instructions, and it shows best with frames of varied heights.